We’re running full speed ahead with some new updates and Ganttic has more than a few things in store.
We’ve made some updates to user profiles with some more efficient ways to set users’ rights with our new User group feature. As well as a new option for bulk permissions based upon a new resource grouping structure.
Read on for more details of how this update can help save you time, increase efficiency, and create a planner that fits your needs for every job, role, planning style, and speed.
Updates for Ganttic Users
Hopefully you’re aware of how users work in Ganttic. With the option to add as many as you need to share in the plans, you also have the ability to control exactly what your users can see and do.
There are 2 types of users: Admins and Users. Whereas Admins have access to all functions, normal Users’ rights can be further specified. Based upon exactly how you want them to interact with Views, Reports, Projects, and Resources. All of this information can now be found in the left-hand column of the User Dialog.
Along with a more user-friendly design regarding permissions, we’ve made a few other minor changes to the User Settings.
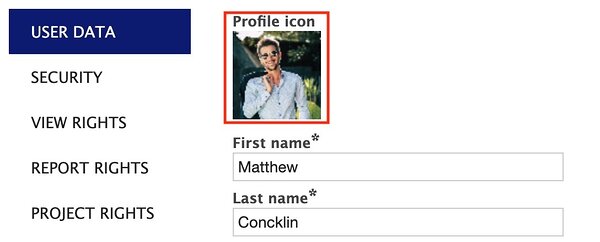
- Option to add a User profile icon – users can now upload an image. This will be visible in their profile as well as on the left hand side of the user list. Helping to make clear who is who, add new ways of customization, and help to define roles. 80×80 pixels work best here.
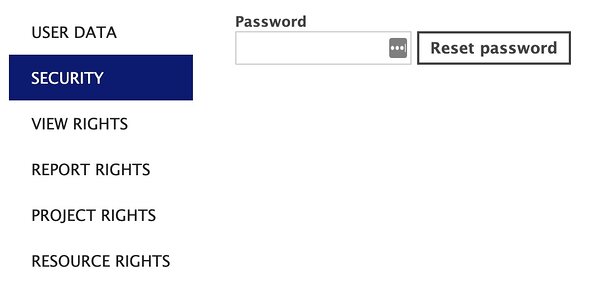
- Security changes – If Admins want to change their Users’ passwords they can now do so in the Security page, as opposed to the main page. This may be helpful if a Ganttic user leaves your company and you’d like to reset their account.
We also added a couple new ways to define your user permissions according to different groups. See what these are below.
Resource Group Rights
When defining Resource rights for your users, in the past you had a couple different options. You could choose one of the default options concerning resource permissions, or you could override the default with some special permissions for editing and viewing.
But what happened if you had the need for special permissions while working with A LOT of resources? Unfortunately it meant A LOT of scrolling and clicking.
Resource grouping to the rescue
That’s why we decided to add a new option of rights called resource grouping. This is custom resource groups based upon your existing List-type Resource Data Fields. And it means you can define what your users see and do using your own data.
How to Group Resources in Ganttic
For example, let’s say your user Jean is based in Germany. Although your company has dispersed teams located around the globe, you’d only like Jean to be able to see, but not edit the available resources in Germany.
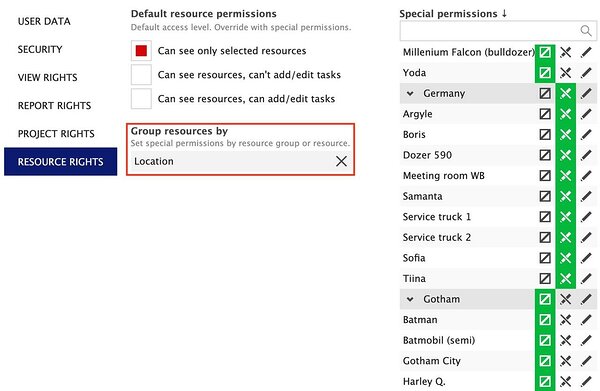
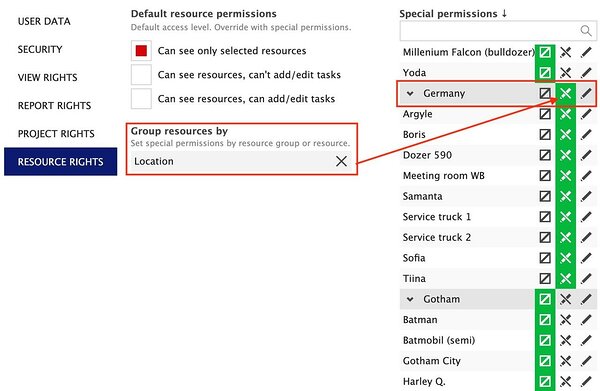
In this scenario, under the section “Group resources by” in Resource Rights, choose the option which best represents your needs. Since we’re concerned where the resources are based, we chose a grouping based on our data field, “Location.”
This will group the resources in the “Special Permissions” table based on Location.
So all we need to do now is click the “Germany” grouping and all resources within that group will be available for Jean to see.
What are the Benefits of Resource Grouping?
This feature limits your clicking and scrolling, saving time and effort that can be better utilized elsewhere.
Tip: There’s no need to apply the group permissions manually for new resources. When new resources are created and assigned the same data field value used as your Resource groups, it will be grouped accordingly in the User’s Resource rights.
New Feature: User Groups
Another way to apply User permissions in bulk is through User groups.
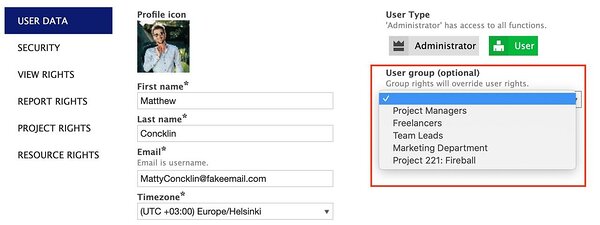
User groups are located in the right hand corner of User Settings.

What are User Groups?
You can create a user group based on department. Or location. Or specific projects. Or any other grouping that helps with your planning.
Then decide exactly what the group needs to get their jobs done. Define their specific resources or set the parameters about projects.
Creating a New User group
For example, let’s create a user group based upon a project. After clicking the User group tab, click on the + Add New button.

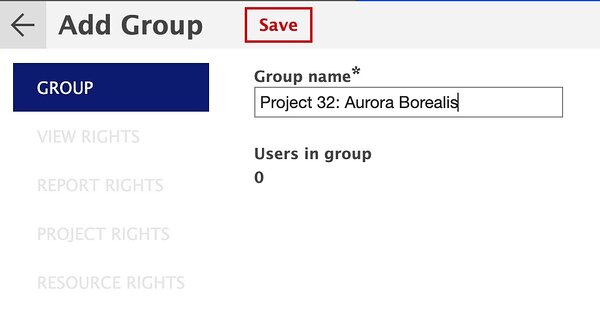
Name your group, in our case we’ll call it the same as the project itself. Then hit Save.
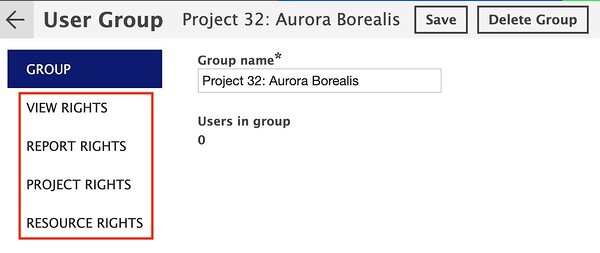
Now we can further define the specific rights users in this group will receive. These include rights pertaining to Views, Projects, Reports, and Resources (and even the Resource grouping rights mentioned above).
Finally we can add the users involved in the project. This is done via the drop down menu under User data.
Once we hit Save the individual users will have the different permissions which we just outlined. Then once a new user is added, they will automatically take on the rights of the group. Plus, if the group rights get updated, everyone in the group will be affected.
What’s the Benefits of User Groups?
This will be a big help to those working with a lot of users. Because now instead of outlining specific rights for all individuals, you can just add them to a group. This is not only an easier solution that saves you time, but it ensures organizational consistency. As adding users to a group guarantees they have the rights they need for their job. But also the rights you want them to have.
Plus, it helps put in place better security company-wide protocols, since you only need to define groups, not individuals.
Sprint ahead with better planning
This latest update should help you get a better handle on your users. And for those who like to involve a lot of parties in their planning, bulk permissions via Resource groups or User groups can be a welcome relief to manually updating everyone you bring aboard. This update is a quicker way to better efficiency.
We have some big changes coming this Q2, so stay tuned to our Twitter and LinkedIn for more updates. And if there’s a feature you think we’re missing, reach out to us and let us know.
Happy planning!